Whisk Up Some Fun: Master the Art of Making Ice Cream in a Bag

Making ice cream in a bag is a fun and interactive way to enjoy this delicious frozen treat. Whether you're looking for a fun activity to do with your kids or simply want to satisfy your sweet tooth, this method is sure to bring some excitement into your kitchen. With just a few simple ingredients and materials, you can whip up a batch of creamy homemade ice cream in no time. So, put on your apron and get ready to whisk up some fun as we master the art of making ice cream in a bag!
Gather the necessary ingredients and materials
To make ice cream in a bag, you will need a few simple ingredients and materials. Here's what you'll need:
- 1 cup of heavy cream
- 1 cup of whole milk
- 1/2 cup of granulated sugar
- 1 teaspoon of vanilla extract
- Ice cubes
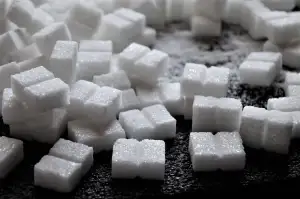
- 1/2 cup of rock salt (such as kosher or sea salt)
- Quart-sized resealable plastic bags (make sure they are sturdy and leak-proof)
- Gallon-sized resealable plastic bags (to double-bag the smaller bags for extra security)
These ingredients are readily available at your local grocery store, and you may already have most of them in your kitchen. Once you have gathered everything, it's time to move on to the next step: preparing the ice cream mixture.
Prepare the ice cream mixture
To prepare the ice cream mixture, you will need to gather your ingredients. Start with 1 cup of heavy cream and pour it into a mixing bowl. Add 1 cup of whole milk and ½ cup of granulated sugar. For flavoring, you can add a teaspoon of vanilla extract or any other extract of your choice.
Whisk the mixture together until the sugar has dissolved completely. You want a smooth and creamy consistency. If you prefer a sweeter ice cream, feel free to add more sugar according to your taste.
Once the mixture is well combined, it's time to get creative! You can add in any additional ingredients you desire, such as chocolate chips, crushed cookies, or fresh fruits. Gently fold them into the mixture until evenly distributed.
Remember that this is your chance to personalize your ice cream and make it truly unique. Don't be afraid to experiment with different flavors and mix-ins!
Once you are satisfied with your ice cream mixture, it's time to move on to the next step: sealing the bag securely.
Seal the bag securely
To seal the bag securely, make sure that all the air is squeezed out before closing it. This will prevent any leaks or spills during the shaking process. Double-check that the ziplock or seal is tightly closed and secure. You can even use a second bag as an extra precaution if you're worried about any potential mess. The last thing you want is for your delicious ice cream mixture to escape and end up all over your kitchen counter! So take a moment to ensure that the bag is properly sealed before moving on to the next step.
Begin the shaking process
Once you have sealed the bag securely, it's time to begin the shaking process. Hold the bag firmly with both hands and start shaking vigorously. This is where the fun really begins! Shake the bag for about 5 minutes, making sure to move it around in different directions to ensure that all parts of the mixture are being mixed thoroughly. You can even get creative and involve your family or friends in this step by passing the bag around and taking turns shaking it. The more you shake, the smoother and creamier your ice cream will be. So don't be afraid to put some energy into it!
Monitor the ice cream's consistency
Once you start shaking the bag, it's important to monitor the ice cream's consistency. After about 5 minutes of shaking, check the bag to see if the mixture has thickened. Gently squeeze the bag to feel if it has become firm. If it still feels too liquidy, continue shaking for a few more minutes.
Be careful not to over-shake though, as this can cause the ice cream to become icy instead of creamy. You want a smooth and creamy texture, so keep an eye on it as you shake.
If you prefer a softer consistency, you can stop shaking once the ice cream reaches a semi-firm state. If you like it firmer, keep shaking until it reaches your desired consistency.
Remember that different ingredients and variations in shaking time can affect the final result. So don't worry if your homemade ice cream doesn't turn out exactly like store-bought ones. The joy of making it yourself is in experimenting and enjoying the process.
Once you're satisfied with the consistency, remove the bag from your hands and carefully wipe away any excess moisture before opening it. Transfer the ice cream into bowls or cones and add your favorite toppings for an extra touch of deliciousness.
Now that you've mastered the art of making ice cream in a bag, get creative with flavors! Add some crushed cookies or fresh fruit to enhance the taste and texture. And don't forget to share this fun activity with friends and family - they'll be impressed by your homemade treat!
So go ahead, whisk up some fun and enjoy every spoonful of your very own homemade ice cream masterpiece!
Enjoy the homemade ice cream
7. Enjoy the homemade ice cream
Once you have achieved the desired consistency, it's time to savor your homemade ice cream! Carefully remove the bag from the larger bag of ice and wipe off any excess moisture. Open the bag and scoop out the creamy goodness into a bowl or cone.
Take a moment to appreciate the fruits of your labor. The smooth texture, rich flavors, and delightful sweetness will surely bring a smile to your face. Whether you chose classic vanilla or experimented with unique flavors, this homemade treat is bound to impress.
Gather your loved ones and share this delightful creation with them. Ice cream has a way of bringing people together, creating moments of joy and laughter. Indulge in each spoonful, allowing the flavors to dance on your taste buds.
Remember, homemade ice cream doesn't last as long as store-bought varieties, so be sure to enjoy it within a few days. But don't worry; it's unlikely that any leftovers will remain once word gets out about your delicious creation!
So go ahead, sit back, and relish in the satisfaction of making your very own ice cream in a bag. It's an experience that not only delights the palate but also fills you with a sense of accomplishment and creativity.
Now that you've mastered this art form, feel free to experiment with different ingredients and flavor combinations. Add crushed cookies for some crunch or swirl in caramel sauce for an extra indulgence. The possibilities are endless!
In conclusion, making ice cream in a bag is not only a fun activity but also a delicious way to enjoy homemade frozen treats. With just a few simple ingredients and some shaking action, you can create creamy delights that rival any store-bought variety.
So gather your friends and family for an afternoon of icy enjoyment. Embrace the process of making something from scratch and relish in the satisfaction of creating something truly special. Whisk up some fun today and embark on your ice cream-making adventure!
Making ice cream in a bag is not only a fun and interactive activity, but it also allows you to enjoy delicious homemade ice cream in just a matter of minutes. With a few simple ingredients and materials, you can create your own frozen treat that is sure to impress.
To ensure the best results, here are some final tips for making ice cream in a bag:
1. Use heavy-duty resealable bags to prevent any leaks or spills during the shaking process.
2. Make sure to squeeze out as much air as possible before sealing the bag to avoid any excess moisture.
3. Shake vigorously and continuously for about 5-10 minutes to achieve the desired consistency.
4. If the mixture becomes too cold to handle, wrap a towel around the bag to protect your hands from freezing.
5. Experiment with different flavors and mix-ins such as chocolate chips, fruit puree, or crushed cookies to customize your ice cream.
Remember, making ice cream in a bag is all about having fun and getting creative. So gather your friends or family members and embark on this delightful culinary adventure together. Enjoy the process and savor every spoonful of your homemade masterpiece!
Published: 27. 11. 2023
Category: Food